A fresh coat of paint can transform the appearance of your home, but getting the best result involves more than choosing a new colour. Proper preparation before interior painting can make the work more efficient and help create a smoother, cleaner finish.
Whether you are repainting a single bedroom or preparing your entire Auckland home for a new look, a little preparation can make a significant difference. From moving furniture to repairing damaged walls, here are the key steps to take before your interior painting project begins.
Decide Which Rooms and Surfaces You Want to Paint
Before work begins, decide exactly what you want included in your interior house painting project.
You may only want to refresh the walls in your living room, or you may be planning a more extensive project covering:
- Walls
- Ceilings
- Doors
- Door frames
- Window frames
- Skirting boards
- Hallways
- Bedrooms
- Kitchens
- Living areas
Having a clear scope makes it easier to plan the project and obtain an accurate quotation from professional painters.
If you are still deciding what work your property needs, you can explore professional painting services to see the different types of painting work available.
Remove Furniture and Protect Items Before Painting
One of the simplest ways to prepare a room is to remove as much furniture as practical.
Large furniture that cannot be removed should be moved away from the walls and properly covered. Smaller items, decorations, lamps and other loose objects should ideally be removed from the room.
Protecting furniture and flooring helps reduce the risk of paint splashes and gives painters enough space to work safely and efficiently.
Professional painting teams will generally take precautions to protect areas that are not being painted, but homeowners can make the process easier by clearing rooms beforehand.
Remove Wall Decorations and Fixtures
Take down artwork, photographs, mirrors, shelves and other removable wall decorations before painting.
Curtains and certain wall-mounted fixtures may also need to be removed depending on the area being painted.
Once these items are removed, the condition of the wall becomes easier to assess. You may discover holes, dents, cracks or other imperfections that should be repaired before applying paint.
Inspect Your Walls for Cracks, Holes and Damage
One of the most important parts of wall preparation is identifying existing damage.
Look for:
- Small and large cracks
- Nail holes
- Dents
- Damaged corners
- Peeling paint
- Uneven surfaces
- Water stains
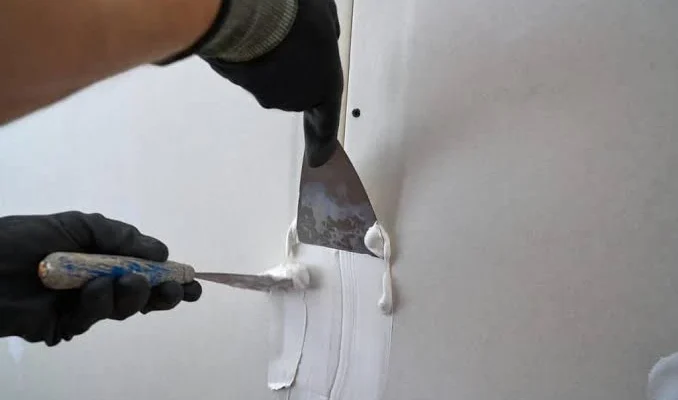
- Damaged GIB
- Visible plasterboard joints
Painting directly over these problems may leave the imperfections visible in the finished surface.
For more substantial damage, professional repairs may be required before painting. FSM Housing provides GIB fixing services for damaged plasterboard and related wall repairs.
Complete GIB and Plaster Repairs Before Painting
If your walls require more than basic filling and sanding, it is worth completing those repairs before the painting stage begins.
Damaged GIB may need to be repaired or replaced, while uneven or deteriorated surfaces may require plastering.
GIB joints and fixing points may also need to be properly stopped and finished before the surface is ready for decorative coatings.
This is particularly important when you want a high-quality finish or are changing from a dark wall colour to a much lighter shade.
Clean Your Walls Before Applying Paint
Dust, dirt, grease and other contaminants can affect how well paint adheres to a surface.
Kitchen walls, hallways and high-traffic areas may require particular attention because they can accumulate more dirt and marks over time.
Cleaning requirements depend on the existing surface and the type of paint being applied. Professional painters can assess the condition of the walls and determine what preparation is appropriate.
The goal is to provide a clean and suitable surface for primer, undercoat and the final paint coats.
Choose Your Interior Paint Colours Before the Project Starts
Colour selection is easier when you consider the whole room rather than choosing a shade in isolation.
Think about:
- Natural light
- Artificial lighting
- Flooring
- Furniture
- Curtains
- Cabinetry
- Existing décor
- The size of the room
Lighter shades can help create a brighter and more open appearance, while darker colours can add depth and create a stronger focal point.
If you are looking for inspiration, explore interior design and painting ideas before making your final decision.
Select the Right Paint Finish for Each Room
The paint finish is another important consideration.
Living rooms, bedrooms, kitchens, bathrooms and hallways can have different practical requirements. Areas that receive frequent contact or cleaning may benefit from a more durable and washable finish, while other spaces may suit a softer, lower-sheen appearance.
The correct product should be selected according to the surface, room conditions and desired appearance.
Plan Around Children, Pets and Your Daily Routine
Painting can temporarily affect how you use your home.
If you are having several rooms painted, consider how you will move around the property while work is taking place. You may need to keep certain rooms clear or temporarily relocate furniture and household items.
Families with children or pets should also make sure they cannot accidentally enter areas while preparation or painting is underway.
Planning these details in advance can make the project much less disruptive.
Allow Enough Time for Proper Surface Preparation
It can be tempting to rush through preparation because the new colour is the most visible part of a painting project. However, preparation is one of the most important stages.
Filling, sanding, repairing, cleaning, priming and protecting surrounding surfaces can all contribute to the quality of the final result.
If walls are damaged or uneven, rushing directly into painting may simply lock those imperfections beneath the new coating.
Consider Feature Walls for an Extra Design Element
If you are already repainting a room, consider whether one wall could be used as a focal point.
A feature wall can introduce a stronger colour or contrasting finish without requiring every wall to be repainted in the same bold shade.
This can work particularly well in living rooms, bedrooms, dining areas and entertainment spaces.
FSM Housing also provides feature wall services for homeowners who want to add a distinctive element to their interior.
What Professional Interior Painters Can Handle
While homeowners can complete some preparation themselves, professional painters can manage the more technical aspects of the project.
Depending on the scope, this can include surface assessment, preparation, protection, repairs, priming, painting and final finishing.
Professional preparation is especially valuable when walls have significant damage or when you are undertaking a large-scale residential repaint.
Get Your Auckland Home Ready for a Fresh Interior
Preparing your home properly before an interior paint job can help the project run more smoothly and improve the quality of the final finish.
Clear the rooms, protect furniture, identify wall damage, complete necessary GIB or plaster repairs, choose your colours and finishes, and allow enough time for proper surface preparation.
For homeowners planning a larger project, FSM Housing offers professional interior and exterior painting services throughout Auckland.
With the right preparation and a carefully planned painting process, you can give your home a fresh, cohesive appearance while creating a finish that is designed to last.