Why Painting Contractors on the North Shore Face Unique Challenges?

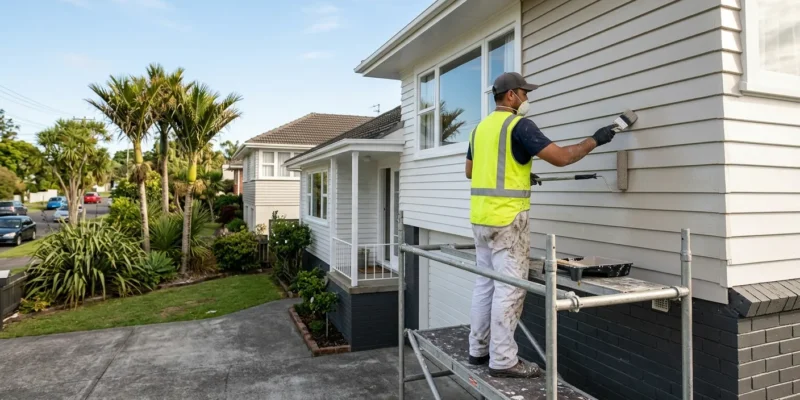
The North Shore of Auckland offers some of the most stunning real estate in New Zealand, but the very things that make the “Shore life” desirable, proximity to the Hauraki Gulf and elevated coastal views, are the primary enemies of a long-lasting paint job. For painting contractors North Shore Auckland locals trust, the job involves much more than just applying a fresh coat of color; it requires a deep understanding of maritime atmospheric conditions and their effect on different building materials.

The “Salt Fog” and Adhesion Failure

If you live in suburbs like Mairangi Bay, Milford, or Takapuna, your home is constantly subjected to “salt fog.” This is a fine mist of chloride-rich moisture that settles on your exterior walls every evening. If a painter simply arrives and starts painting, they are essentially trapping a layer of salt between the substrate and the paint film.

Professional painting contractors North Shore Auckland know that “standard” preparation isn’t enough here. The surfaces must undergo a specialized chemical wash to neutralize the salt ions. Without this step, the salt will eventually draw moisture through the paint (osmosis), leading to localized bubbling and peeling within just 24 months of completion.

The North Shore’s Architectural Diversity

One of the unique aspects of working as a painter on the North Shore is the sheer variety of substrates. In a single day, a team might move from a 1920s weatherboard villa in Devonport to a high-performance cedar and steel contemporary home in Albany.

Each of these requires a different technical approach:

  1. Heritage Villas: These require careful management of old lead-based layers and the use of flexible primers that can handle the expansion and contraction of old-growth native timber.

  2. Modern Linea & Cedar: New developments in areas like Long Bay often use composite materials or dark-stained cedar. These require specific “Cool Colour” technology to prevent the boards from warping under the intense UV reflected off the nearby ocean.

Managing the “Shore Wind” During Application

Aucklanders know that the North Shore can be significantly windier than Central or South Auckland. For painting contractors North Shore Auckland wide, wind management is a critical safety and quality factor. High winds cause paint to dry too quickly, leading to “lap marks” where the finish looks uneven. Professional teams monitor the “wet edge” of the paint and often adjust their application methods, switching from spraying to hand-brushing, to ensure a smooth, uniform finish despite the coastal breeze.

Protecting Your Asset Value

On the North Shore, your home is likely your most significant financial asset. A subpar paint job doesn’t just look bad; it can lead to moisture ingress in window mitres and structural timber rot. By hiring contractors who specialize in the North Shore’s unique micro-climates, you are investing in a protective system that accounts for salt, wind, and the highest UV levels in the region.

When choosing a contractor, ask about their specific experience with coastal warranties and salt-neutralization processes. A truly local expert won’t just give you a price; they will provide a technical plan to keep your home looking pristine against the elements.

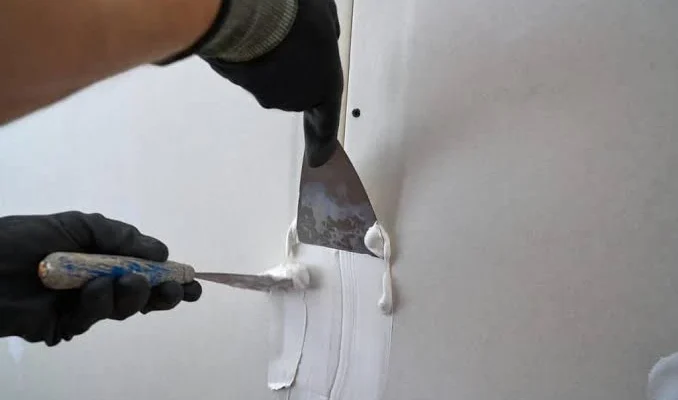
Why Integrated Plastering Services in Auckland are Key to Home Longevity?

In the Auckland construction industry, plastering is often viewed through the lens of aesthetics, the smooth finish on a wall or the sleek look of a modern exterior. However, plastering is fundamentally a technical performance trade. Whether you are dealing with a classic bungalow in Mt Albert or a contemporary build in Hobsonville, the quality of your plastering services Auckland wide dictates how your home breathes, how it handles moisture, and how it retains value.

The Exterior Envelope: More Than Just a Coating

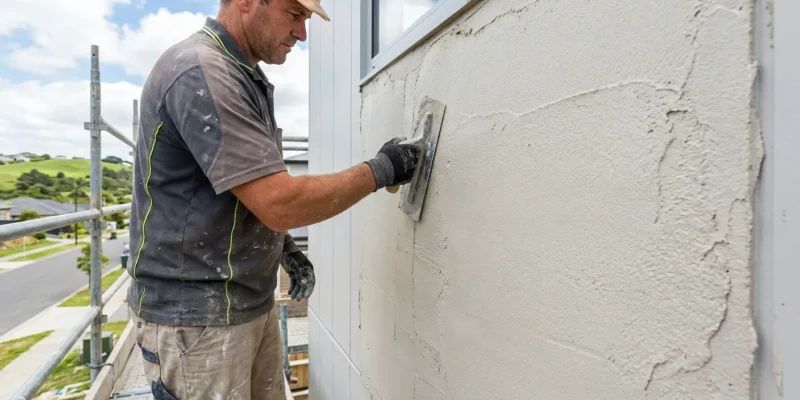
In our maritime climate, exterior plastering serves as the primary “skin” of the building. Unlike many parts of the world, Auckland faces high-velocity driving rain and extreme humidity. This means your exterior plastering system must be a sophisticated, multi-layered barrier.

Modern plastering services Auckland now utilize specialized Acrylic Modified Renders and EIFS (Exterior Insulation and Finish Systems). These aren’t just layers of cement; they are engineered systems that include drainage cavities and breathable membranes. This is critical for Auckland homes to prevent the “internal sweating” that leads to mold growth inside wall cavities. When we talk about plastering, we are talking about a moisture management system that protects your structural timber from the elements.

Interior Plastering: The Aesthetic Foundation

Inside the home, the role of a plasterer shifts toward precision and light management. Many homeowners confuse GIB stopping with general plastering, but true plastering services include specialized finishes like Venetian plaster, sand-finishes, or acoustic plastering.

In Auckland’s high-end residential market, suburbs like Remuera or Herne Bay—we are seeing a resurgence in “solid plastering” for interior feature walls. This involves traditional hand-applied techniques that provide a depth of texture and a “cool-touch” feel that standard drywall cannot replicate. Furthermore, professional interior plastering acts as a secondary layer of acoustic insulation, dampening the sound between rooms, a vital feature for the increasing number of work-from-home professionals in the city.

The “Settlement” Challenge in Auckland Soils

Auckland is built on a variety of soil types, from the volcanic rock of Mt Eden to the reactive clays of the North Shore and South Auckland. These clays expand and contract significantly between the wet winter and the dry summer. This soil movement causes houses to shift, which inevitably leads to cracks in poorly applied plaster.

Expert plastering services Auckland address this by using fiberglass mesh reinforcement embedded within the plaster layers. This “skeletal” support allows the plaster to move slightly with the building’s frame without shearing or cracking. Without this technical reinforcement, even the most expensive paint job will fail as the substrate beneath it gives way.

Choosing a System for the Future

When selecting a plastering provider, it is essential to look for a team that understands the New Zealand Building Code (E2/AS1) and the specific warranty requirements of different cladding systems. Plastering is not a “one-size-fits-all” trade; it requires a deep understanding of substrates, from brick and block-work to fiber-cement and polystyrene.

By investing in high-quality, professional plastering, you are doing more than just choosing a color for your walls. You are ensuring that your home remains watertight, thermally efficient, and structurally sound for the next generation of Aucklanders.


The Bond-Back Strategy: Navigating End of Tenancy Cleaning in Auckland’s Strict Rental Market

In Auckland’s fast-moving rental market, the bond is often a significant financial sum, sometimes upwards of $3,000. Under the New Zealand Residential Tenancies Act, tenants are required to leave the property in a “reasonably clean” condition. However, “reasonably clean” is a subjective term that often leads to disputes between tenants and property managers. To guarantee a smooth handover and a full bond refund, professional end of tenancy cleaning Auckland wide has become the gold standard.

The “Property Manager” Standard vs. Domestic Clean

A common mistake tenants make is assuming their regular weekly cleaning routine is enough for a final inspection. Property managers in Auckland often use a 50-point checklist that looks for things the average person ignores. This includes the internal tracks of sliding doors (a magnet for Auckland grit), the dust on the very top of ceiling fan blades, and the mineral buildup on shower glass caused by Auckland’s water.

Addressing the Auckland Humidity Factor

One of the most frequent reasons for bond deductions in Auckland is the presence of mold or mildew. Because of our high humidity, mold often thrives in the “invisible” spots: the rubber seals of washing machines (if included), the back of built-in wardrobes, and the ceiling vents in bathrooms.

Professional end of tenancy cleaning Auckland services prioritize these areas using commercial-grade anti-fungal treatments. This isn’t just about wiping away the black spots; it’s about neutralizing the spores so the mold doesn’t return before the landlord conducts their final walkthrough 48 hours later.

The “Kitchen Degrease”

The kitchen is the most scrutinized room in a rental inspection. Property managers will always check the rangehood filters and the interior of the oven. Over a long tenancy, grease becomes “baked on” and becomes nearly impossible to remove with supermarket-grade cleaners. A professional service includes a full degrease of these appliances, often restoring them to a near-new condition that satisfies even the strictest Auckland agencies.

Saving Time and Stress

Moving house in Auckland is logistically challenging, especially when juggling truck rentals and parking in suburbs like Ponsonby or Newmarket. The last thing you want to do after a long day of moving boxes is to return to an empty house to scrub floors for six hours.

By outsourcing your end of tenancy cleaning Auckland needs, you aren’t just buying a clean house; you are buying an “insurance policy” for your bond. Most professional teams provide a guarantee, meaning if the property manager is unhappy with a specific area, the cleaners will return to rectify it at no extra cost.

Why Landlords Love Professional Cleans?

It’s not just for tenants. Landlords in South and West Auckland often hire professional cleaners between tenancies to ensure the property is presented in the best possible light for the next viewing. A sparkling clean home attracts higher-quality tenants and allows you to command a premium rent in a competitive market.

The Value of “Durability-First” Painting in the South Auckland Property Market

South Auckland is a region defined by growth, diversity, and a high concentration of residential investment properties. From the family-centric streets of Manurewa to the rapidly developing subdivisions of Takanini and the established neighborhoods of Papatoetoe, property owners here face a unique set of challenges. When looking for painters south auckland landlords and homeowners can rely on, the priority shouldn’t just be about finding the lowest quote, it should be about “future-proofing” the asset.

In a market where many homes serve as high-occupancy rentals or house large, multi-generational families, the wear and tear on interior and exterior surfaces is significantly higher than in other parts of the city. To protect your investment, you need a painting strategy that prioritizes durability and “cleanability.”

The “Rental-Proofing” Strategy

For property investors in the South Auckland area, the goal is often to minimize maintenance costs between tenancies. Standard contract-grade paint might look good on day one, but it lacks the resin density to withstand frequent scrubbing.

When we consult as painters south auckland specialists, we recommend moving away from flat or low-sheen finishes in high-traffic zones like hallways and kitchens. Instead, utilizing modern, high-tech water-based enamels provides a hard-wearing surface that allows tenants to wipe away scuff marks and fingerprints without burnishing the paint or removing the color. This small upgrade in paint quality can extend the life of an interior paint job by several years, saving thousands in mid-tenancy touch-ups.

Exterior Protection for High-Density Living

South Auckland’s climate can be surprisingly harsh. Being slightly further inland than the coastal North Shore, suburbs like Takanini and Papakura can experience higher humidity and frost in winter, coupled with intense heat in the summer.

For the many weatherboard and brick-and-tile homes in the region, the exterior paint serves as the primary barrier against moisture ingress and timber rot. In high-density developments where houses are situated closer together, “micro-climates” of dampness can form in shaded alleys between buildings. Professional painters south auckland must ensure that they use mould-resistant additives and high-build primers to prevent the growth of lichen and moss, which are prevalent in the more humid pockets of the south.

Maximizing Capital Gains with “Street Appeal”

The South Auckland market is incredibly competitive. Whether you are selling a family home or looking to attract high-quality tenants, first impressions are dictated by “street appeal.”

A professional exterior transformation does more than just look pretty; it signals to potential buyers or renters that the property has been well-maintained. We often suggest a “modern neutral” palette—using warm greys or soft stones that appeal to a wide demographic while helping the home stand out against the more dated 1970s browns and creams common in many South Auckland suburbs.

Why Local Expertise Matters?

Choosing a painting team that understands the South Auckland landscape is essential. It’s about knowing which products work best on older state-house weatherboards versus modern James Hardie cladding. It’s about understanding the logistics of working in busy, high-traffic neighborhoods and respecting the local community.

At FSM Housing, we take pride in being more than just laborers; we are partners in your property’s longevity. We understand the specific needs of South Auckland homeowners because we are deeply embedded in the local industry. You can learn more about our commitment to quality and our team’s background on our website.

By investing in a high-quality, durability-first paint job today, you are effectively reducing your long-term renovation costs and ensuring that your South Auckland property remains a high-performing asset for decades to come.

The Hidden Residues: Why Post Construction Cleaning Services Auckland are Essential for a High-End Handover?

In the excitement of completing a new residential build or a large-scale commercial development, many owners and project managers overlook the final, most critical step: the transition from a construction site to a clinical, move-in-ready environment. While the builders have done their job, they often leave behind a specific type of debris that a standard domestic clean cannot handle. This is where professional post construction cleaning services Auckland become a technical necessity.

The “Silicone Scrim” and Window Etching

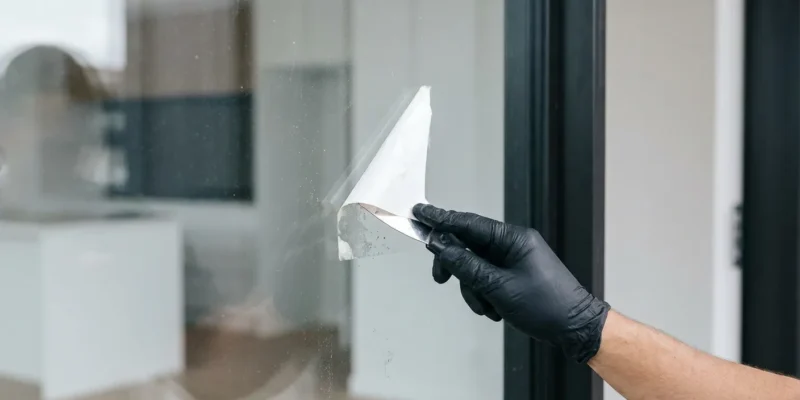
One of the most common issues in new Auckland builds is the residue left on joinery and glass. During construction, silicone sealants, window stickers, and protective films are applied. Over months of exposure to Auckland’s high UV and salt air, the adhesives in these products can bake onto the glass.

Standard cleaning often involves scraping, which, if done incorrectly, can permanently scratch expensive double-glazed units. Specialized post construction cleaning services Auckland use citrus-based neutralizers and industrial-grade glass cleaners to break the chemical bond of the adhesive without compromising the surface of the glass. This is particularly vital for coastal homes where salt spray can mix with construction dust to create an abrasive “paste” on window tracks.

The Challenge of Grout Haze

Modern Auckland interior design heavily features large-format tiles in bathrooms and kitchens. After tiling is complete, a “grout haze” (a thin film of dried minerals) often lingers on the surface. To the untrained eye, it looks like a bit of dust, but it cannot be removed with a mop and bucket. If you paint or seal over grout haze, you trap the dullness forever.

Professional post-construction cleaners use acidic or alkaline-based cleaners (depending on the tile type) to strip the haze away, revealing the true color and luster of the stone or ceramic.

Fine Dust and the “HVAC Trap”

Construction dust is heavy and pervasive. It doesn’t just sit on the floor; it floats into the “dead zones” of a house. This includes the tops of kitchen cabinetry, inside electrical socket boxes, and most importantly, into the ducting of heat pumps and ventilation systems.

If a home is occupied before a technical “sparkle clean” is performed, the first time the HVAC system is turned on, it will distribute fine GIB dust and sawdust throughout the entire house. A professional post-construction service includes vacuuming the internal components of these systems and cleaning the filters to ensure the air quality is safe from day one.

Glue Residue on New Flooring

Whether it is high-end engineered timber or luxury vinyl planking, new floors are usually protected during the build with “Ram Board” or plastic films. While these protect against dropped tools, they often leave a microscopic “tackiness” behind. This residue acts like a magnet for dirt. If not professionally stripped and neutralized, your brand-new floors will look “dirty” within days of moving in, no matter how much you vacuum.

The Three-Stage Handover

When we discuss post construction cleaning services Auckland with our clients, we focus on the three-stage approach:

  1. The Rough Clean: Removing all large debris, stickers, and protective coverings.

  2. The Builders Clean: The detailed removal of grout, silicone, and paint splatters.

  3. The Sparkle Clean: The final polish that adds the “wow factor” for the owners.

Investing in a professional cleaning service is the final insurance policy for your construction project. It ensures that the craftsmanship of the painters, plasterers, and builders is seen clearly, without the distraction of construction grit.

Tips to choose the right fence paint

Make the first right impression… with your fence.

When it comes to making your home shine, look further than the house itself. A well-maintained fence surrounding your property can be the magic touch that allows your home to stand out from the neighbour’s.

A fence with personality doesn’t mean you have to go overboard with bright colour; an elegant, subtle shade can bring equal amounts of wow factor and street appeal.

There comes a time when our garden fences start to look worn and dated, paint becomes chipped and peeling, requiring a fresh coat of paint. Painting it will not only make it look stylish but maintain its quality too.

When you’re ready to paint, consider how you want your fence to work for your property. Do you want it to appear unnoticed compared with your house? Or would you prefer it to ooze character, popping out in personality? Expand your thinking from simple whites and explore the possibilities of other colour options. The right choice will certainly ensure visual appeal to those passing by.

When considering your colour, take into account a few points. Whatever shade you choose, even if it is a bold, contrasting hue, it needs to complement your landscaping and home. Ensure it relates to your exterior; consistency is key for a cohesive look throughout your property. After all, your fence is the setting for your outdoor space.

COLOURS

The classic white picket fence painted in Resene White or Resene Alabaster complements most styles of homes, but particularly those of a heritage fashion. A safe option is to go with a colour that echoes your house shade, such as a vintage-style cream or warm neutral.

For visual interest, coordinate your fence with the colour used on your home’s trim, such as a pale grey or a soft dusky blue. This will bring an attractive edge to the traditional fences that surround older homes. Throw in a surprise element by painting your posts a different colour for contrast, be it a gentle tone or a bright hue.

For an elegant hint of colour, navy blue is a subtle tone that brings character to a fence and garden. It beautifully suits against homes in white or soft gentle colours.

If you want attention drawn away from your fence, preferring it to recede, a dark charcoal grey, like Resene Charcoal, is best. This contrasts with any foliage you have growing, focusing on such greenery. The dark tones will encourage the eye to zone in on the plants’ colour, not the fence itself.

Black, such as Resene All Black, may seem like a scary choice to some, but it is less noticeable than you might think. It’s a sophisticated choice that suits a contemporary home, or a villa that has been renovated with a modern extension. To soften this dark tone, guide vertical planting, such as climbers, to extend your garden upwards, bringing lush greenery to your setting. When you’re choosing a dark colour outside, choose the Resene CoolColour version to help reflect more heat than a normal version of the colour.

An easy choice for a fence colour is to use the same colour as your home’s exterior. If your front door is in a bold, vibrant colour, you can bring this accent to your fence too – be it on your letterbox or the fence posts.

COMBINE NATURAL ELEMENTS

Take your cue from the plants in your garden when they’re in bloom. You may have the fire-orange from a bird of paradise plant growing in your garden, which you could bring onto a statement feature wall in your back patio. Just as you might have an accent wall in your interior, consider this as the same but outside.

Coloured feature walls are always beneficial in winter, when the summer blooms have died down, and there is less colour in the garden itself. A bright hue on a feature wall allows for character through all of the seasons. Choose a pastel hue or an earthy warm colour for an inviting setting. Such a feature creates an intimate space when combined with white outdoor furniture and lush planting, zoning certain areas. Use a neutral paint colour or Resene wood stain on the remainder of your fence to let your feature wall shine.

Let the natural grain of your wooden fence resonate, apply an exterior stain, such as Resene Waterborne Woodsman. You can find your ideal shade from a range of colours in the Resene Exterior Woodcare chart – your stain will need to be reapplied every few years to keep your fence looking great. Existing stains and weathering will show through a wood stain finish – for an old weathered and stained fence always clean it first with Resene Timber and Deck Wash before staining for the best result.

Take into account whether your interior has natural timber features on the flooring and joinery, or on your home’s exterior cladding. Echo this in the same way, applying a simple stain to let the natural wood hold its own.

Get creative with the layout of your slatting on timber fences, choosing to lay them horizontally can provide a streamlined look. Paint the top half a dark colour, such as Resene Woodsman Pitch Black timber stain, leaving the bottom half in a more natural look with Resene Woodsman Natural timber stain, for interest.

If you can see your back fence from your home’s living area, consider how you create a seamless flow in this regard. Black-framed bi-folds may grace your modern home, so why not repeat this accent with a black fence around your garden? The visual continuity will be pleasing to the eye.

If your home has a basic material combination of warm wood, fresh white and a dark accent colour, repeat this in your fence. You might have a stained timber posts with white weatherboards connecting them.

Combining various surfaces can work together in favour of your home and are ideal for those who love pattern and print. Exterior tiles in colourways that blend in with your house are a way to bring interest to your outdoor setting, be it an outdoor courtyard with a garden or a pool area with tropical planting. Tile one part of your fenced area, then pick a colour from these tiles and paint your surrounding fences in the same colour in Resene paint.

By getting creative with your fence, whether it’s in a subtle fashion or a bold manner, you’ll guarantee instant street appeal and, more importantly, better longevity of your fence, especially if you honour the style and aesthetic of your house in your choice of paint.

Contact us for a colour consultation and a free quote for your exterior project.

Thanks to RESENE for the information & inspiration.

Credits: https://www.resene.co.nz/

Popular Interior Trends for 2021

Express your style through the interior of your home.

TRADICIONAL

Traditional interior schemes are decadent and timeless.    To create your traditional ambiance, select your favorite antiques, classic artwork and use sophisticated, deeper colors as the perfect backdrop.

With a color palette of deeper hues of blues, rich claret and burgundy reds, burnished orange and deep greens as well as olive and ginger you can make the traditional scheme bolder in your home.


Hamptons

Soft blues and greens, neutral grey, sand and warm whites, creates a beautiful Hamptons feel.

For a New Zealand “Hamptons” twist, Dulux Cardrona or Opononi Quarter with Dulux Southern Alps trims. For a soft blue try Dulux Waikanae or for a soft green try Dulux Kohukonui.

For an elegant Hamptons style, keep your decorating simple and effective, however not too minimalist – it’s all about balance. The layering of textiles and textural objects will create a beautiful, elegant look. For a warm grey try Dulux Te Kaha or Manorburn.


Rustic

The rustic style is alluring in rich and deep reds, warm browns and golds as well as tans and beige.

Deep greens can be used for accent as well as mustards and rich blues.

To create a Rustic style layer warmer colors, such as terracotta, rich natural timber and showcase solid furniture.


Scandi

Whites are a great place to start for a “Scandi” style.

Use timeless warm whites like Dulux Okarito, Dulux Cardona or Manorburn Quarter. Then add layered raw and natural textiles with antiqued objects and Scandi timbers.

For a bolder Scandi look, use darker and natural colours in furnishings and layered textiles to add to the overall design. Dulux The Remarkable is a gorgeous charcoal with a subtle blush undertone, which is striking against these soft whites such as Hakataramea.


Modern

The Modern style has a colour palette of subtle and dark greys, brighter block colours mixed with the cooler most loved Dulux Whites.

Try Dulux Okarito or Dulux Hakataramea along with cooler greys such as Dulux Mt Hikurangi or Grey Lynn. Use a bright white on trims such as Dulux Southern Alps.

To bring your Modern look to life keep your decoration simple with clean lines. Colour schemes should be simplistic and elegant. Using pops of bright colour with a classic white will give your home a modern, yet timeless look.

BY: Dulux.co.nz

10 Eco-Friendly Landscaping Ideas

Homeowners want to have the perfect yard. It should be filled with shrubs and trees organized in a visually appealing manner. However, landscaping not only tends to be costly but also harmful to the environment — but this shouldn’t be the case. We encourage you to take note of nature as you create and maintain your yard. With this in mind, here are 10 eco-friendly landscaping ideas.

1. Practice Xeriscaping

The idea of xeriscaping dates back to 1981. Basically, it refers to a landscaping practice that focuses on surviving drought. Your area doesn’t need to be exposed to drought for you to consider xeriscaping — the point is for homeowners to reduce the need for watering. Thus, it’s a way to save on your water bills.

One simple form of xeriscaping is to place plants with the same water requirements together for an efficient irrigation. Likewise, you can replace some of the grasses in your property for drought-resistant variants. These include  feather grass, blue oat grass, purple fountain grass, and the yellow pampas grass. Similarly, succulents such as agave, aeonium, sedum, and crassula plants are ideal choices.

2. Install a Sprinkler System

Irrigation is an important activity in any landscaping project. After all, you must maintain the lush and green appearance of your shrubs and trees. Nobody wants to have discolored and wilting foliage. Even though you cannot completely eliminate the need for water in your yard, you can always do it more efficiently.

Instead of doing it manually with a garden hose, why not install a sprinkler system? This eliminates the need to do it all on your own. Plus, you get to set the time and application rate. In addition, a drip irrigation system should work best for garden beds. This saves water by targeting the root systems instead of the foliage. Water them deeply to encourage deep root establishment that makes plants better equipped to combat strong winds and diseases.

3. Understand Your Area

Whether you’re moving to a new area or you’ve stayed in the same residence for years, you should know the pros and cons of being there. For example, areas that are prone to strong winds would mean using more water. A house that resides in an uneven area should be prepared for soil erosion and runoff. This way, you’ll know early on where to install protective barriers and implement a design that resists erosion — saving you from high repair costs in the long run.

Likewise, you can take advantage of the sunlight. If you live in a cold region, you can have south-facing windows to welcome warmth in your home. Your property can also be designed in such a way that your front yard and driveway receive adequate sunlight. This makes it easier to manage the accumulation of ice and snow during winter.

4. Use Synthetic Grass

This might sound like it’s directly opposite to the goal of an eco-friendly yard, but this will save you resources in the future. Synthetic or artificial grass resembles your lawn grass without requiring much maintenance. You don’t have to buy any chemical fertilizer, pesticide, or herbicide that can lead to water pollution.

Water is also unnecessary in keeping the vivid appearance. No matter how many times your kids and pets run around, the grass won’t suffer from heavy foot traffic. There’s also no need to get a lawnmower that could release toxic fumes into the atmosphere. Furthermore, your local area might even provide a rebate if you switch to synthetic grass.

5. Replace a Section of Your Lawn

A huge lawn containing natural grass will be costly to maintain. If you don’t want to use artificial grass, you should at least consider cutting back on the size of your lawn. For example, beardtongue plants only need a yearly trimming as they provide colorful flowers throughout summer and fall. In addition, the Santa Barbara daisy works great as a vibrant edging plant.

In addition, you can develop a patio and a pathway to guide your visitors around your yard. There are many eco-friendly backyard pathway ideas you can choose from — some people cover their walkways with wood chips or mulch. A fallen or broken log can be cut to create wooden pallets for a pathway as well.

6. Get a Green Roof

The landscape isn’t limited to your yard. Instead of having a conventional roof, you can turn it into an eco-friendly roof that could significantly reduce your energy bills. Apart from reducing the heat inside your home or even providing insulation when needed, a green roof will also minimize water runoff. Of course, it also feels nice to relax on one’s own green roof.

Basically, your roof will be covered with lush vegetation. Local authorities encourage this type of sustainable roof construction — and it will surely improve the value of your property. It can effectively reduce noise pollution while also serving as the haven of plants and birds

7. Have a Green Wall

Also known as a living wall, this landscaping idea turns your wall into a garden of its own. You can easily grow herbs and flowers here using containers and planters. Apart from serving as an area for more plants, it also improves the appearance of your yard. Privacy is also improved since a living wall serves a barrier to prevent strangers from peering into your property.

8. Included Exterior Lighting

Installing some lights in your yard ensures that it will be appealing even at night. Furthermore, external lighting provides a sense of security due to the increased visibility. A smart way to get lighting without spending more is to buy a solar-powered variant. Essentially, these lights will generate power throughout the day before they illuminate at night. Get some lights with motion sensors as well if you want them to be activated only when someone’s around.

9. Use Mulch

We previously mentioned that pathways can be covered with mulching material. Well, a layer of mulch should also be used in other areas. Placing mulch around your shrubs prevents weeds from spreading. In addition, it keeps the temperature cool for the root systems.

Moisture is also better retained with a layer of mulch. While organic mulch can be bought in your local garden, it can also be made using coconut fibers or bark. The mulch eventually decomposes to feed the soil, so you don’t have to pay attention to it after the application.

10. Get Reusable Landscaping Materials

Reusing materials is not only good for the planet but also for your wallet. A popular reusable material is a natural stone, which looks great and durable at the same time. Decorative natural stones can be placed anywhere you like. For example, they look great at the side of your pathway. Stones can also be used to surround a flower bed or a beautiful tree. They can be moved around whenever you want and they will definitely last a lifetime.

Overall, landscaping doesn’t mean you have to harm the environment. Looking for environmentally friendly options can be as simple as having an efficient irrigation system and looking for materials to recycle or reuse. Similarly, it helps to take advantage of the geography. Creating a green roof or wall should also be considered.

We hope that our guide inspired you to practice eco-friendly landscaping. If you have any questions, feel free to send us a comment.

By: Conserve Energy Future

The Best Paint Sheen for Your Kitchen

Choosing paint for a kitchen is especially important because of the nature of the space and how it is used. In addition to choosing a pleasing color for this room in which you’ll spend a considerable amount of time, you also need to choose a paint that will hold up to use, and that is readily washable. The basic “scrub-ability” factor is determined by the paint’s sheen.

Continue reading “The Best Paint Sheen for Your Kitchen”